Friday, June 29, 2012

Front Porch: Before and After

Your probably sick of hearing about baby showers so I wanted to sneak in my weekly house update before the week is over. I decided to finish up with the downstairs and give you a run down of the before and after of the front porch. Believe it or not, two of my favorite things about our house is that it has a front porch and a huge walk up attic. The down fall is that in the heat of the summer, both the front porch and the attic are comparative to a furnace! In the future I would like to turn my attic into an art studio for myself. As for the front porch it is still usable in the evenings when it cools off and in the spring and fall. This is our front porch when we first bought the house. It was a storage room for tools for a little while.


Once it was cleaned up a little bit I decided I wanted to make it look more homey and inviting. We had leftover paint after painting our bedroom. The paint that we used in our bedroom is Sherwin Williams Rainwash. It is very similar to the color in our living room.


I wasn't sure if it would look better if I painted all of the panelboard or just the bottom portion. The best way to find out was to paint it all and see how it looked. I ended up repainting the stop portion back to white. Then I brought in the furniture, decorations and sheers. The white sheers are from JC Penny and the teal sheers in the left of this photo were from Christmas Tree Shop. It created just enough privacy for us to spend time on the porch but also lets enough light shine in. This was the first time I had ever hung curtain rods by myself and they were a pain in the butt! At least now I know how to do it!


Before


After


In the springtime I enjoyed eating me breakfast and dinner out here everyday!

Thursday, June 28, 2012

Baby Shower Highlights

My baby shower that I mentioned in my last post was on Saturday. My Mom threw an amazing party. She always does! I didnt get to help her but when I walked in the hall this is what I saw.


Here is a closer look at the tables.

My mom made the centerpieces by attaching a vase to these cute baby toys that she found for $1.00 each! And that is one of my pom pom balls that I made used as a half ball to decorate the table. It was my Grandma's idea to insert the leaves under the pom pom ball to make it look like lilly pads! It all came out so cute.


Notice the Goya hot sauce? The food theme for the party was spanish food. My Grandma, Mom, and Adriana catered the party. They made spanish rice, steak tips, chicken, and plantains! My mother and father-in-law also brought three platters of sandwiches!


My Mom made more of the vanilla extract for party favors.


And the beautiful cake was made by Janet who also made our announcement party cake. We also had the cookie bar and more cake pops.


Our friend Sheila surpised us by making this adorable Baby Carraige Fruit Basket! Her and Keeana also made a Motorcycle Diaper Care Package!


Aren't they so creative!

My mom doesn't throw the typical baby shower. She invites couples rather than just women. My mom likes to have a good time and she doesn't like the guest to be bored. That's why the place she rented had a dance floor and of course she had to have a DJ there too. Here is another cute inexpensive way to decorate which we used on the DJ table.


This is just a simple paper chain made out of scrapbooking paper. It is a great project for kids, my six year old neice was able to help make this.

While we opened gifts my Mom entertained the guests with all sorts of games. This is a great way to distract your guests if you don't like attention (if your anything like Johnny and myself.) And of course my Mom made sure to reward them with prizes!


Homemade Swedish Fish Vodka


And an assortment of other homemade Vodkas and Kahluas. I was able to decorate the bottles! They make great gifts.


Pineapple Infused Vodka


Pear Infused Vodka

Like I said, not the typical baby shower - but totally awesome and we had a great time!

Monday, June 25, 2012

Pom Pom Balls and Fancy Paper Fan Party Decor

I haven't mentioned it within the past few weeks but I had another baby shower this past weekend! It was on Saturday. I am so relieved that I have made it this far. I was paranoid that I would have the baby early and not make it to my shower. My mom didn't really want me involved too much in this shower. She said she wanted to try and keep most of it a surprise. That's why my Grandma flew in from Florida, to help organize the party. My mom did ask me if I could do some of the party decorations which I gladly took on this task. I'm the kind of person that if you sit me in front of a T.V. and expect me to watch T.V. I can't. I need to be constantly doing something. So in the late evenings, before bed, while I watched T.V. I have been working on party decorations - specifically Pom Pom Balls and Fancy Paper Fans. These are both really easy to make, it's just time consuming. So every evening for about two weeks I made a couple fans and a couple Pom Pom balls.

The Pom Pom balls are made out of tissue paper. You can get a value pack of tissue paper at Christmas Tree Shop, the dollar store, or ocean state job lot for only $1.00. For each Pom Pom ball you need 8 or 9 sheets of one color. Neatly stack all 8 sheets of tissue paper.


Once you have all 8 sheets neatly stacked you have to fold the tissue paper like an accordion. Each fold should be about 1 inch wide.


Once you have the entire sheet folded you will need to use wire or a pipe cleaner and tie it around the center of the of the folded tissue paper.


Get your scissors and round off or create triangles in the ends.


Then fan out the pom pom and very gently peel apart each sheet of tissue paper.


Once you have finished you will have a complete tissue ball.


Attach a piece of fishing wire to the the pipe cleaner so that you can hang the pom pom ball. The cool thing is that no one will see the fishing wire because it is clear. Because I decided to start making the Pom Pom balls In advance I didn't open them up because I didn't want them to get ruined or dusty. These are all the Pom Pom balls I made.


I think I went a little crazy.

The fancy paper fans are even easier than the Pom Pom balls. I first got this idea when I spent the evening with my Mom in Northampton. We went to get a massage and then out to dinner. When we were walking to the restaraunt we did some window shopping. One window was eye catching because it was decorated with the paper fans. That's when I said, "Mom, wouldn't these be awesome for the shower?" All you need is either square scrap booking paper or fancy wrapping paper cut into square pieces I got a whole pack of scrapbooking paper from Walmart for $5.


You will need two sheets of the same kind of paper.


Fold the paper like an accordion. Once your finished fold the accordian paper in half the long way and staple or tape the center folds together.


 Fan it out.


You will notice that this creates only half of the paper fan. You have to repeat the process a second time with the same patterned paper. Then staple or tape the two halves of the circular fan together.


 Here are what my fans looked like. I created all different sizes for variation.


These would even make great decorations for your house!  I hope this post is helpful for cost effective decorating at your parties

Wednesday, June 20, 2012

Living Room: Before and After

The living room and the dining room progressed at about the same rate. They were the two easiest projects in the house and that is why we tackled them first.


 As mentioned before in my dining room post the first task for the living room was sanding the walls and painting. We were fortunate that we did not have to gut this room or do any construction on it.


Once it was completely painted the living room served as a storage room for a brief period of time while the kitchen was worked on. This is where our appliances found their first home.


As time past and the kitchen was pieced together like a puzzle the blinds were welcomed in. They are the same blinds that we used in the dining room.


 Our biggest mistake was bringing in the couch!


 Now we had a comfortable place to sit which gave a great excuse not to work as hard! The set up of the living room was a little bit unusual. It may not seem like it because it's one large rectangular room with plenty of space. The dilemma in planning the set up of the furniture was that we have a lot of openings. We have two wide doorways and the rest of the walls have windows. We first tried the couch pushed flush against the windows but I didn't like the idea of having the couch facing straight into the dining room. It also didn't leave much of an option of where to put the T.V.. I decided to try something a little different. I squared off the room by moving the couch. I found this to be cozier and more inviting.


 Curtains went up too! Other furniture slowly moved in. We used a vintage chest as our T.V. stand. Then Johnny's blue leather chair was added and another chest that my father in law made. We also got another area rug ... Guess from where? Another Pier 1 Import fantastic deal! I was really excited when I could finally hang pictures. I created a picture wall. The only thing that we haven't added is a coffee table. It would be a nice addition to the room but I'm afraid that if I put a coffee table in the living room we will never eat in our dining room! Or it could become a clutter table instead of a coffee table. Instead, we decided to put in a desk for those late nights when I have homework to do!


Before


After


Feels like Home!

Monday, June 18, 2012

Planning a Bridal Shower

Its a very exciting time when a best friend ask you to be their maid of honor... and that's truly what it is, an honor. When Keeana asked me to be the maid of honor at her wedding back in May I did not hesitate to say yes! I was so happy that she was getting married and that I would be able to take part in sharing the occasion. Along with being maid of honor comes the duty to throw the personal bridal shower. I wanted my party for Keeana to be perfect, and I was worried that it wouldn't be. I had come to the conclusion that I wouldn't be able to throw the party anywhere fancy because I was now on a budget. Buying a house, remodeling it and then finding out that your pregnant does that to you. I had no other option than to throw it in the comfort of my own home. At first thought this may not seem like such a bad thing but for me it meant that my house had to be liveable - past the demo construction stage and well into the decorative stage. Fortunately we were able to make that deadline. Hosting the party at my home put the pressure on. I wanted it to be fun, cozy and also have the feel that it was being held in a restaurant. That's why I decided to make a list. I'm typically not a list type of person. I don't like to be bound by an agenda but having this list kept me very organized. I was able to check things off as I went. This is how my list looked.

Agenda

5:00 – Light Refreshments
5:30 – Salad served
5:45 – Meal

6:30 – Dessert & Gift Opening

7:30 – Start Video

8:00 – Limo arrives

Table Settings:
·       Borrow 8 dinner plates from Alicia    
·        Borrow 8 chairs from Alicia
·        Two foot tables from work                  
·        Chalkboard from Mom’s (need to paint)
·        Silverware

Beverages:
·        Huckleberry Lemonade
·        Diaste Mascoto
·        Water Bottles
·        Soda Cans

Salad:
·        Spinach Greens
·        Cherry Tomatos
·        Goat Cheese
·        Grapes
·        Pears
·        Craisins
·        Glazed Walnuts

Breschetta:
·        Loaves of Bread
·        Fresh Mozzarella
·        Tomatoes
·        Pesto Spread 

Dinner Meal: Stuffed Shells
Dessert: Cupcakes & Coffee

Other Foods:

·        Fruit / Cheese / Cracker Platter
·        Chocolate Covered Strawberries

Party Favors Ideas:
·        Spread the love

Other Necessary Items:

·        Babies Breath
·        Flowers
·        Candles
·        Notepad & Pen
·        Games
·        Prizes
·        Decorations
·        After Dinner Mints
·        Chalk

I know it seems very detailed and it it may seem a bit extreme but I really wanted this evening to be special. This first thing I had to do was order the invitations for Keeana at www.polkadotdesign.com . Make sure you order your invitations knowing that it will probably take about 2 weeks for them to be delivered and then you have to assemble them. While I waited for the invites to arrive in the mail I had Keeana create her guest list and get addresses for me. These are the lingerie / personal shower invitations that I chose.
Pink Bra Invitation
You can also check out this other website, www.tickledpinkdesign.net . This is where we ordered my baby shower invitations. They usually run a deal for new customers. We recieved 25% off the invites below. 


Over the course of time I picked up decorative pieces. A week before the party I made the party favors. I ended up getting little glass jars from Christmas tree shop, filled them with jam, and made personalized stickers on them that said spread the love and had Mike and Keeana's wedding date on it.


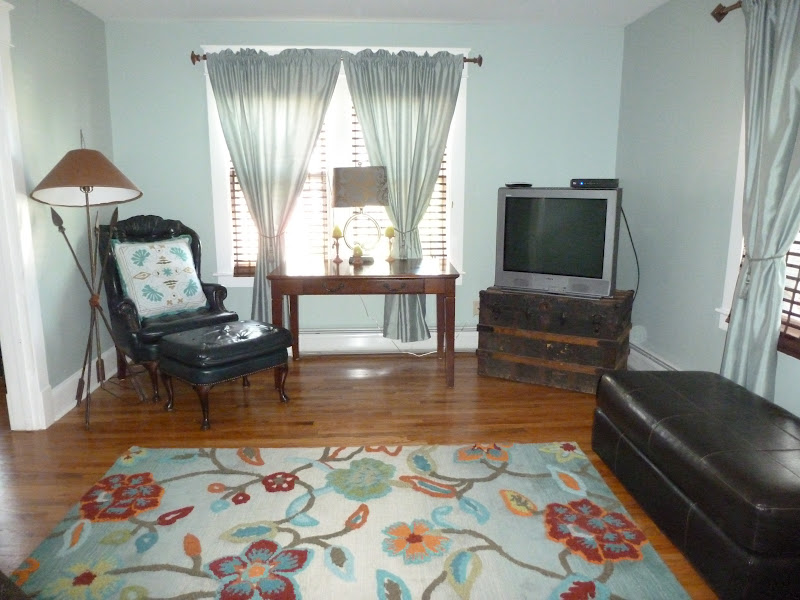
 A few days later, on Wednesday, Johnny rearranged the house. The dining room was too small to seat 16 people for dinner so we turned the living room into the dining room and the dining room into the living room.
Look familiar? Probably not - but remember my post from last week of the dining room? Well this is the dining room transformed into the living room.


I borrowed an assortment of dining room chairs from my mother in law. Thursday my priority for the showers was grocery shopping. Friday I designated as cooking and baking day. I also set and decorated the tables so that we we could have a sit down dinner.


I loved the romantic look that resulted! Exactly what I was aiming for.

Where did I get my table decor?
  • Table cloths from Ocean State Job Lot for $5.00 each
  •  Teal cloth napkins 4 for $2.00 at Ocean State Job Lot too.
  • The runner was a roll of burlap that I was able to find at Joanne's Fabric
  • Large dinner plates? (Mine! - a wedding gift from target.)
  • The small assorted plates - these were also from Target. I didn't mind spending the money on them because I can reuse these.
  • Wine Glasses from Costcos 12 for $12.00
  • Everything else was items that I already owned


  • Saturday morning I thought that I would have a lot to do but because of my list and chipping away at it a little bit each day I found myself entirely prepared and with a lot of free time to relax and wait for the party to begin. The only jobs I had to get done before 6:00pm was cutting the fruit, making the salad and breschetta and folding the napkins. I youtubed how to fold napkins and it was actually really easy!

I made this menu board for the party and set it up at the entrance of my house.


I also dressed up the staircase a little bi with ivy and lights.


 While the guests were arriving we served appetizers.


Following our appetizers was a three course meal which included a Mandarin Salad, Breschetta, and the guests choice of Stuffed Shells, Chicken Cordon Bleu, or Chicken Parmigiana. It was then time to open gifts.


While gifts were being opened coffee and dessert was offered.


Everyone seemed to be having a great time but little did they all know that they were in for a surprise. At 8:00pm there was a knock at the door and behind the door was a man with a champagne glass motioning towards a limo. Thanks to my mom, Keeana's evening was made super special by renting a stretch limo made to fit 20 people. Everyone was invited to go out in it. The first stop is where the mothers were dropped off and they spent the rest of their evening there. Arrangements were made for their pick up. As for us girls ... We continued on in the limo and made a few stops along the way. We all has such a great time and made it safely home by midnight.


Being 7 months pregnant - I was exhausted by the time I got home and fell in love with my bed!